Opening a safe - The DIY way
A few months ago I came into posession of a small safe. Okay, that sounds like I stole it. (Which I did not!). Let me phrase that differently.
A few months ago, someone sold me a safe without the combination. That sounds like I bought a stolen safe, so just marginally better.
A few months ago I bought a house, which happened to have a safe in it. The sellers inherited the house and didn’t know the combination.
Short story unnecessarily long, I had a safe and no combination to open it.
After having dealt with the pressing things of moving in a new place, the safe happened to be in the way. And since the previous owners didn’t even know whether there was something in the safe, the prospect of treasure was also in the room.
At first I tried watching some YouTube videos and learning how to decode a safe lock. I tried that way for a few evenings, but didn’t make any progress on that front.
So, obviously I had to go down the hacker way of safecracking: Builing an autodialer to brute-force the combination lock.
Basic approach
So the basic idea is pretty simple:
- Take a stepper motor from the pile of hardware that wanted to be a 3D printer but that never took shape.
- Botch some mounting on the stepper motor to turn the dial.
- Dial all the combinations until it opens.
Hardware
Apart from the “leftover” stepper motor, the 3D printer had to donate one of the stepper drivers, a DRV8825 module. Combined with a NodeMCU as the brain of the operation, some wires and half a breadboard the “digital” parts of the setup are done.

The open question was adapting the autodialer to the dial of the safe. I don’t own a 3D printer myself. I could print a part in my local hackerspace, but I am not really experienced designing parts, so that would take some considerable time.
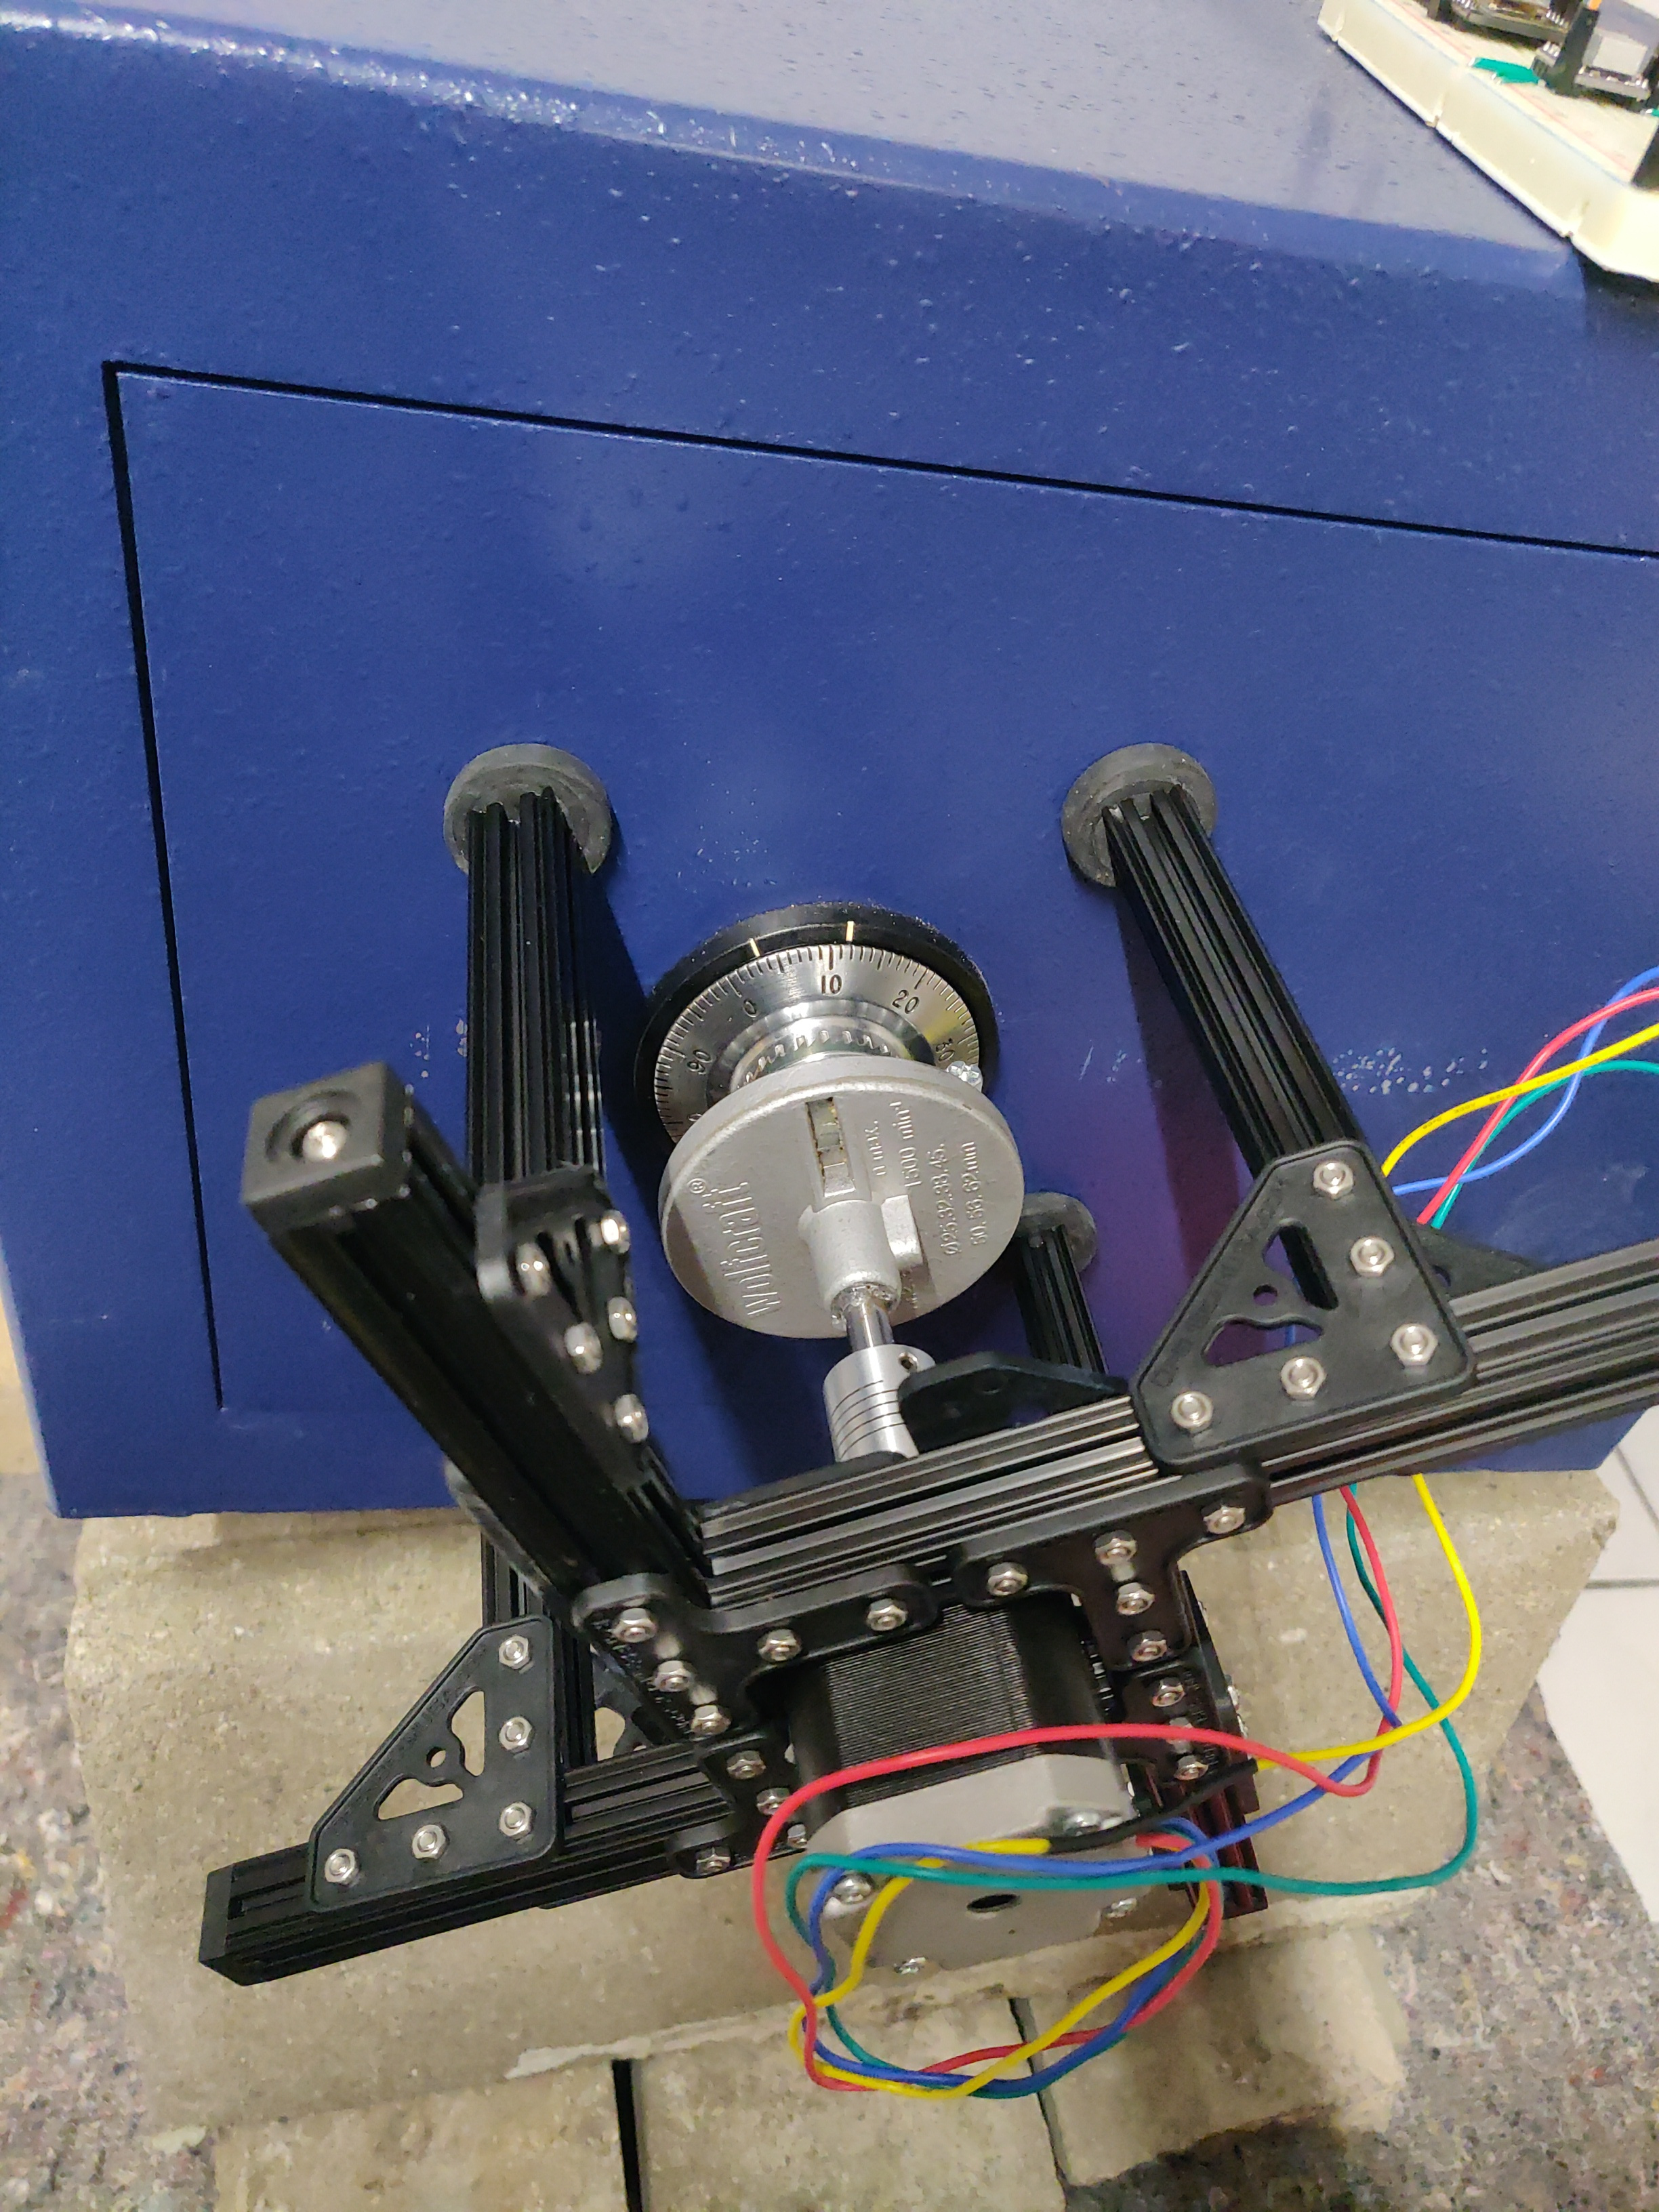
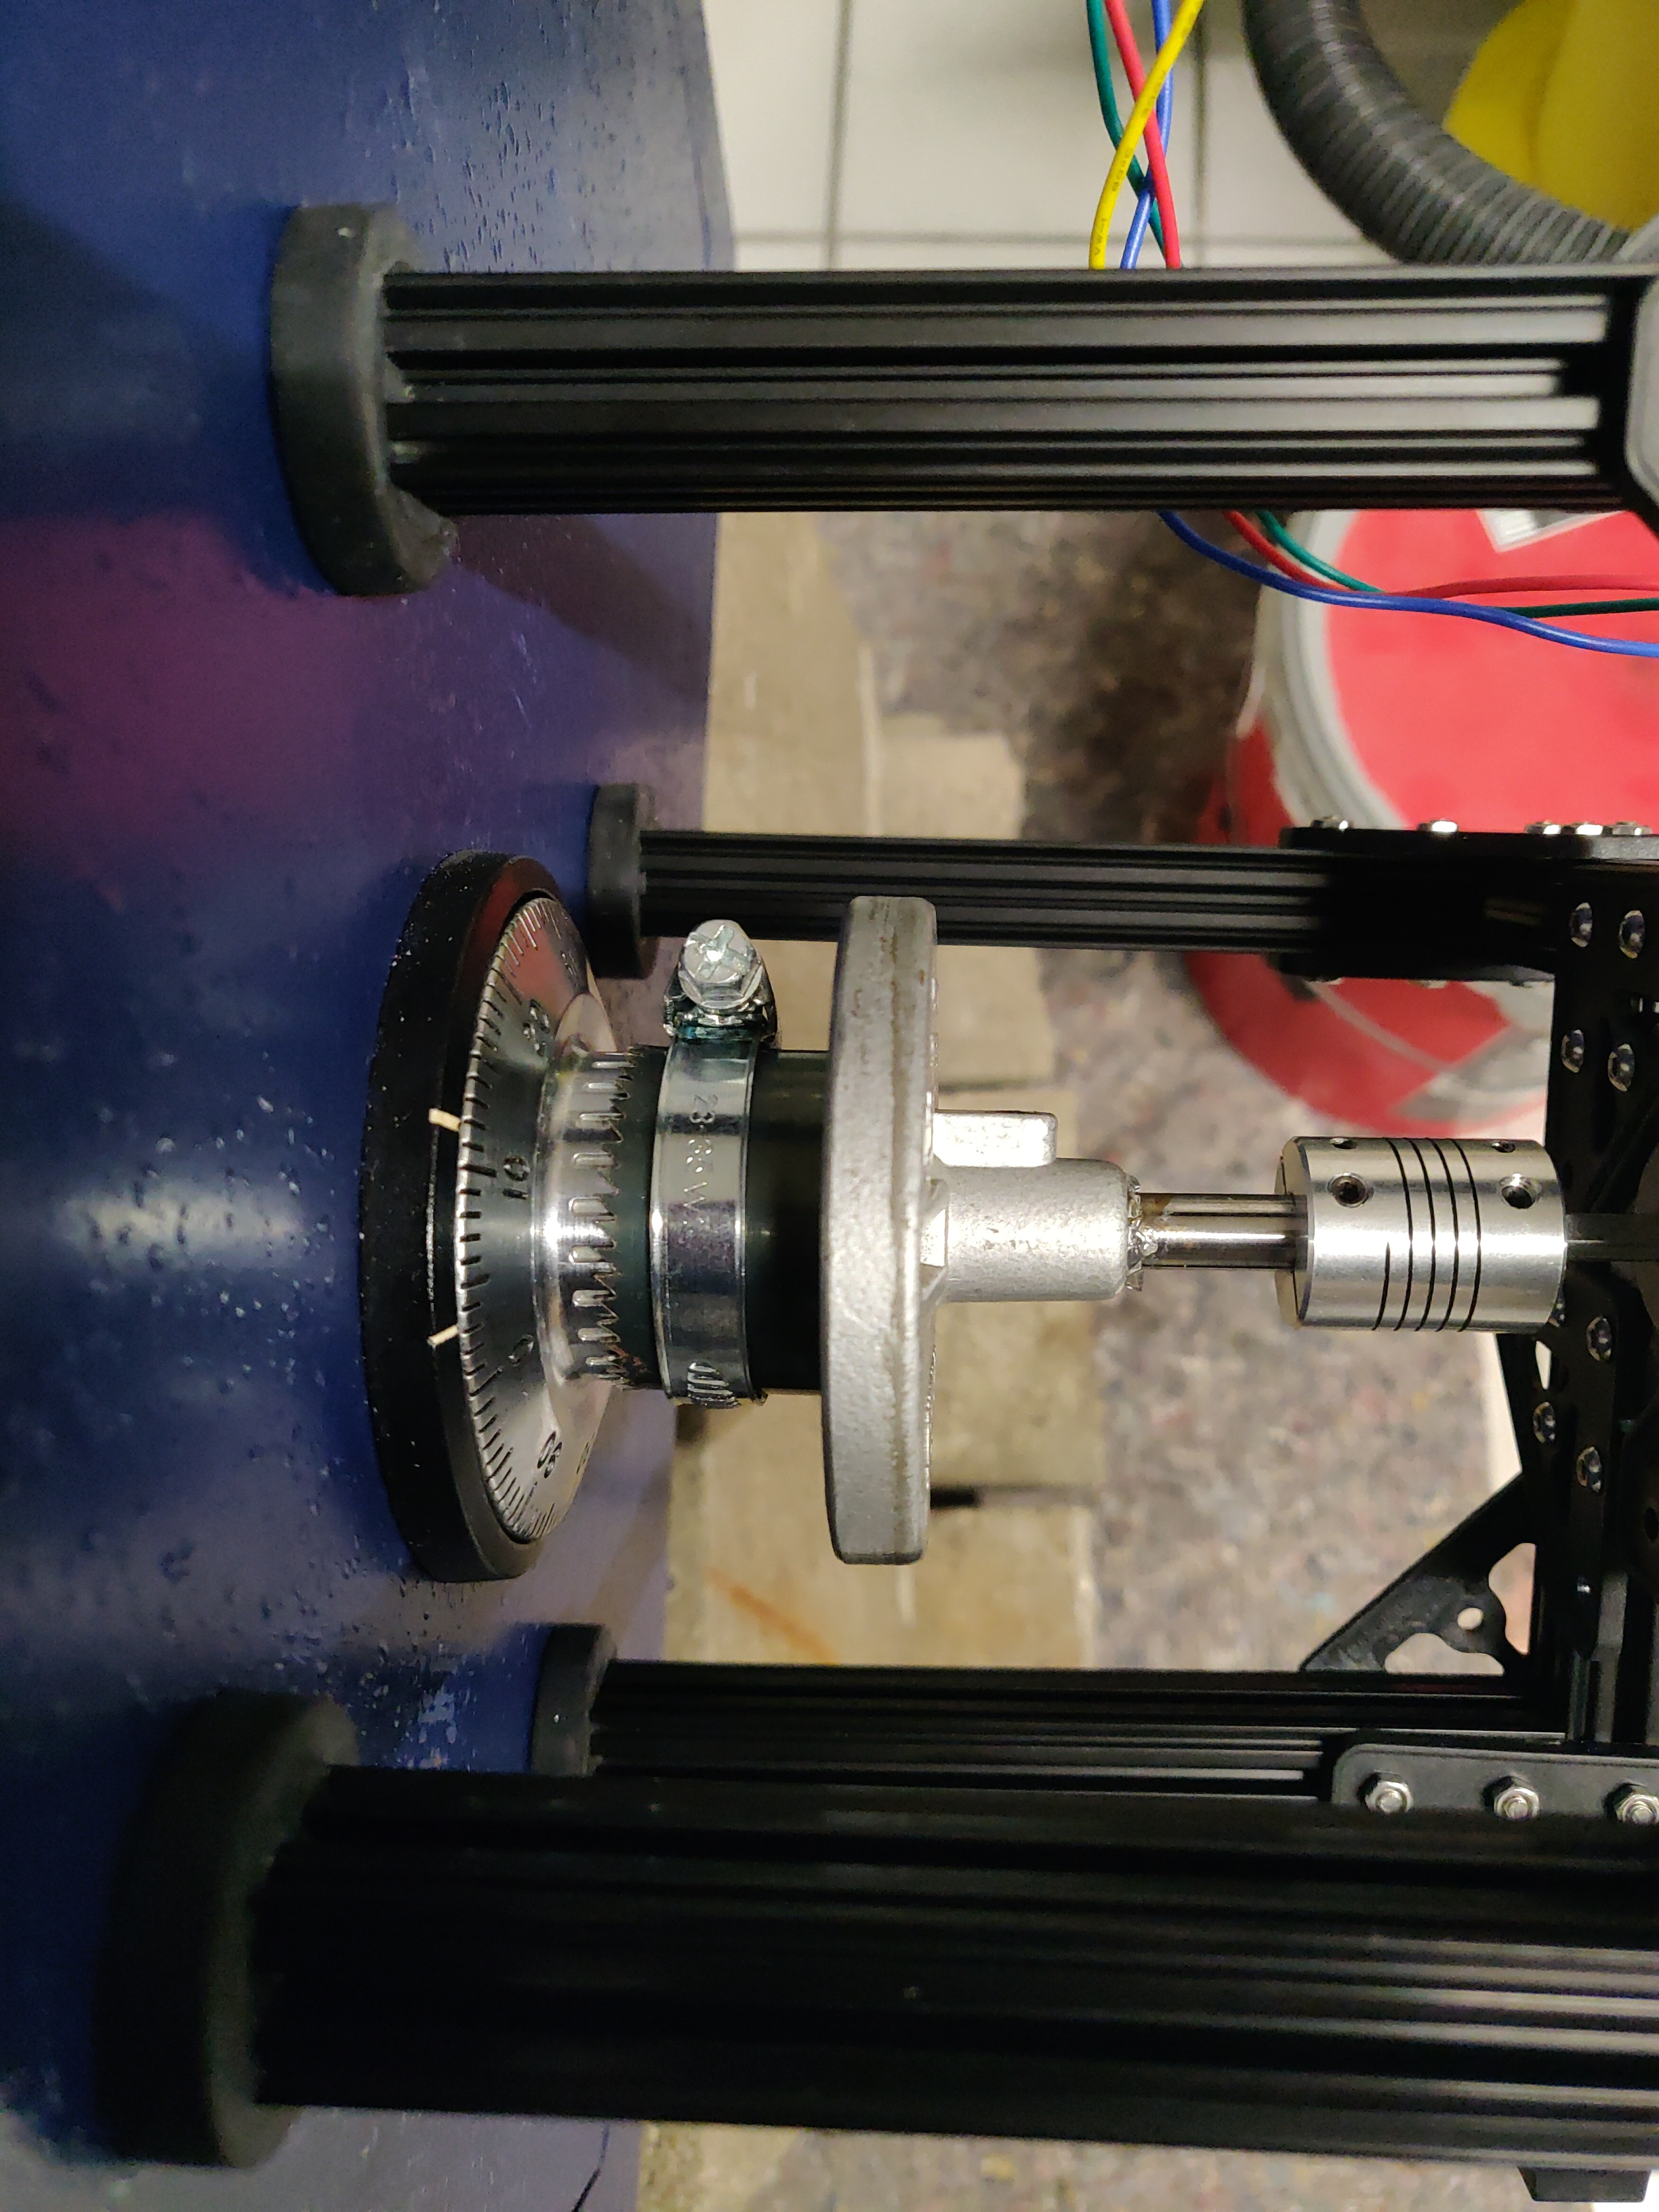
While scouring through the house for something to use, I found an old hole saw. The motor was mounted to the door with some MakerBeam and four magnets. The connection was made with some steel shaft, a flexible coupler and some CA glue to fix the shaft in the hole saw.
Software
I used the opportunity to move from using the Arduino IDE to Platform.IO. After going through the usual steps of debugging, I ended up with a basic implementation of an autodialer.
The firmware for the ESP8266 can do some basic rotations, some initializations and then start the brute-force process.
Since I didn’t expect the safe lock to be of particular high precision, I only checked every other number to speed up the process.
Here is a very short clip of the autodialer working on cracking the combination (Sorry for the fan noise).
I kept the speed low, since I didn’t want to stress the stepper and the glued connection too much.
The software has no detection when it should stop dialing, so it will just keep on dialing after it found the right combination. To make sure that the door opened on the right connection, I strapped a piece of cable duct to the door (making do with what was laying around) and put some tension on it. This should pull open the door and give me the opportunity to decode the door from the inside.
I put the software on GitHub, so if you ever need to crack a safe, you might give it a crack. But beware, I know there is a bug in there. Somehow I messed up the directions and the calculation of the dial settings, so the dialer works inverted. When it is told to dial a 5, it actually dialed a 95. And I guess there might be some more issues in there, especially when dialing “close” combinations, like 5-5-5.
Performance
With my settings the dialer took about an hour to make one increment on the first number. That meant, it could take roughly two days to fully test all combinations. I guess there is some performance to be gained by speeding up the stepper, but I decided to be paitent instead.
After about a day the first glue connection gave up, so I had to repair it and restart. (Obviously that meant adding a “restart” option to the firmware).
And as luck has it, it took me almost the full two days to get the safe open. But it did open in the end.
To my great disappointment it was empty, apart from the user manual of the safe and the change key to change the combination. So, no treasure this time … well, apart from the safe.