My Take on DNSSEC – Part 2: How does it work?
As I already explained in Part 1, the current state of DNS is pretty insecure. The goal of DNSSEC is to improve this situation. Here is how that (should) work. I won’t go into cryptographic details here, but just show the general behaviour.
Lets have a look at the domain testmichhartundwild.de. There is a DNS server responsible which provides some general records.
There is no DNSSEC here and every record could be manipulated by an attacker.
Now we activate DNSSEC. To do so, we generate cryptographic keys and use these keys to sign the records in the zone. Let’s not talk about why we use multiple keys here. It would work with just one key, but we have reasons to use more than that. (The small green arrows in the images show existing signatures)
Now this zone is signed by the DNSKEYs and every user could verify the signatures against the key. There is still a problem though. How can we trust the keys? The attacker could simply replace the keys and create his own valid signatures.
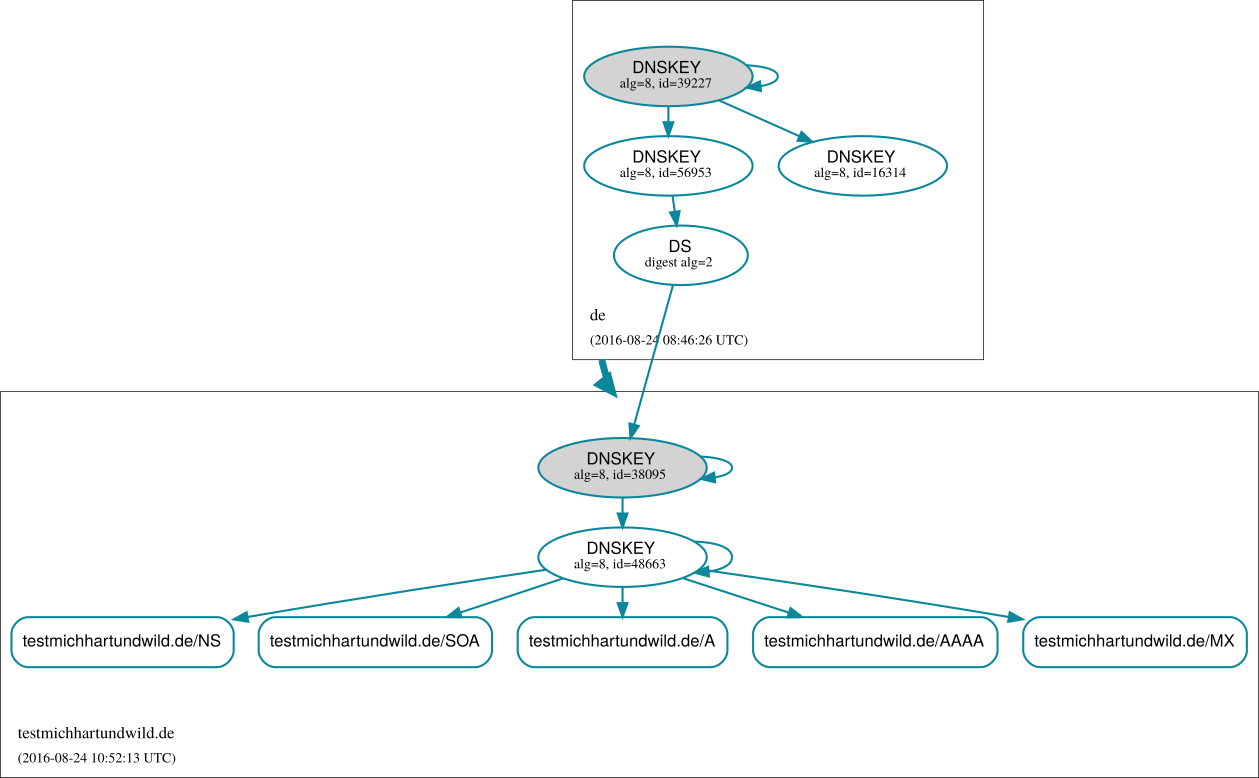
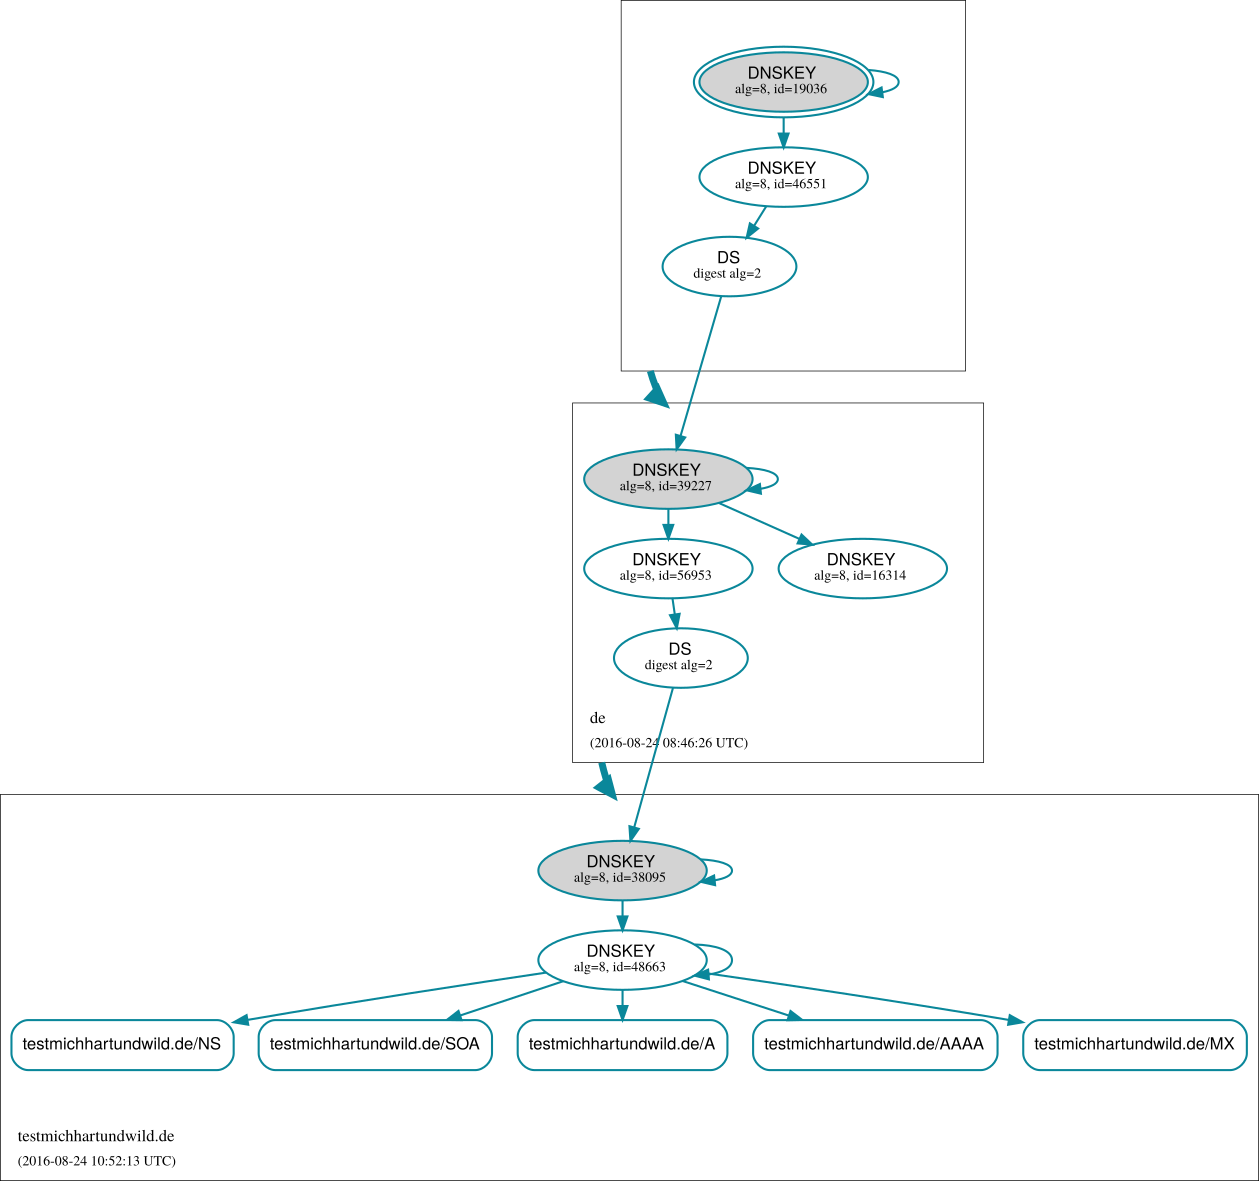
To overcome this problem we need the cooperation of the upstream domain, in this case .de. We publish the fingerprint of the first DNSKEY as a DS record in the TLD. The TLD uses its own key to sign this fingerprint. This leads to a trustworthy DNSKEY in our zone. But that only works if we have a way to trust the keys of the TLD.
Basically we are in the same situation as before, needing a way to verify the keys of the TLD. So we do the same as before and the TLD publishes the fingerprint in the parent root domain.
And again we are in the situation of needing to trust the root key. But now we don’t have any parent zone to publish the key fingerprint. The solution is pretty simple. We give everybody the fingerprint of the root key. Every piece of software that wants to verify the dnssec signatures is just preloaded with the root key. For example the bind DNS server has this part in the configuration:
        # ROOT KEY: See
        # https://data.iana.org/root-anchors/root-anchors.xml
        # for current trust anchor information.
        # NOTE: This key is activated by setting
        # "dnssec-validation auto;" in named.conf.
        . initial-key 257 3 8 "AwEAAagAIKlVZrpC6Ia7gEzahOR+9W29euxhJhVVLOyQbSEW0O8gcCjFFVQUTf6v58fLjwBd0YI0EzrAcQqBGCzh/RStIoO8g0NfnfL2MTJRkxoXbfDaUeVPQuYEhg37NZWAJQ9VnMVDxP/VHL496M/QZxkjf5/Efucp2gaDX6RS6CXpoY68LsvPVjR0ZSwzz1apAzvN9dlzEheX7ICJBBtuA6G3LQpzW5hOA2hzCTMjJPJ8LbqF6dsV6DoBQzgul0sGIcGOYl7OyQdXfZ57relSQageu+ipAdTTJ25AsRTAoub8ONGcLmqrAmRLKBP1dfwhYB4N7knNnulqQxA+Uk1ihz0=";
Now we are able to verify all the records by following the signatures until we reach the root key.
This concludes the general mechanism of DNSSEC. In the next part we are going to have a more technical look on how to configure a DNS server to properly generate DNSSEC signatures and secure their zone.


